User management provides multiple methods for adding users. The following are detailed steps and instructions:
Create a user
-
Log in to the system using the administrator account.
-
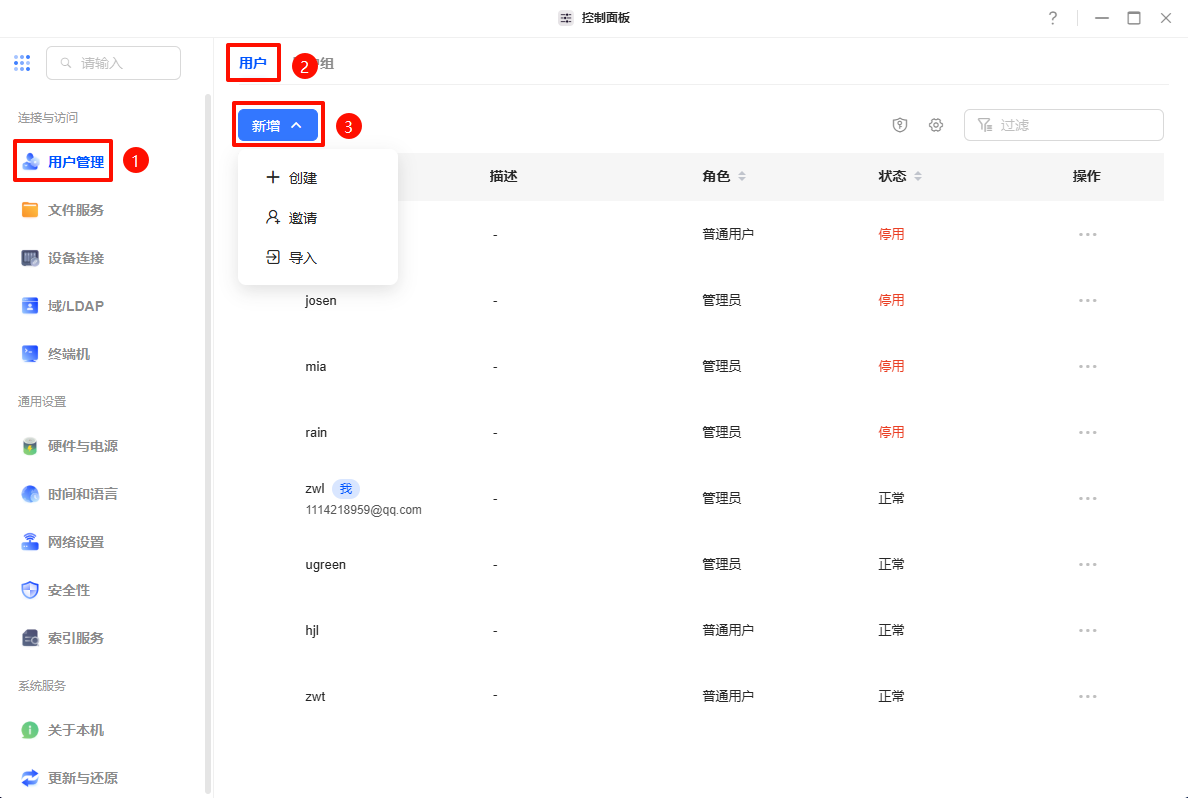
Open the "Control Panel" app and on the main Control Panel screen, find and click on "User Management".
-
On the user management page, click the "Add" button in the upper right corner.
-
In the pop-up window, select "Create" to manually enter the information of the new user.
-
Fill in the user information:
-
Username: Enter the username of the new user, ensuring that it is unique.
-
Password: Enter the new user's password and confirm it again.
-
Role: Select the role of the user, either normal user or administrator.
-
Enable personal folder: Decide whether to enable the personal folder for this user and set the storage capacity limit as required.
-
Password change permission: Decide whether to allow the user to change their own password.
-
Click "Next" to continue. Set the user's access rights to shared folders (no access, read-only, read/write)
-
Confirm the information and click "Finish" to create the user. The new user can log in directly to the system by entering their account and password.
Invite users
-
On the user management page, click the "Add" button in the upper right corner.
-
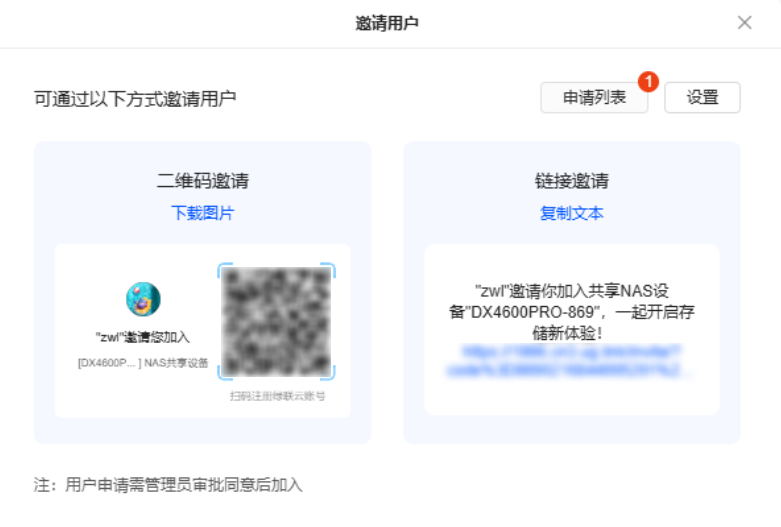
In the pop-up window, select the "Invite" method to invite new users to join the system.
-
The system will generate an invitation link or QR code, which the administrator can share with the new user via email, SMS or social media.
-
The invited user needs to click on the link or scan the QR code, and follow the prompts to complete registration and login.
Note: If you need to invite users via the external network, please ensure that the UGREENlink function is enabled so that new users can successfully access the invitation link.
-
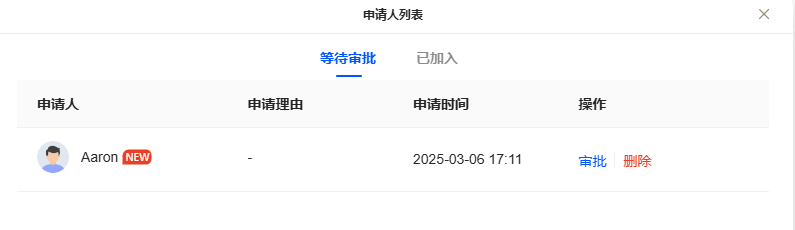
The administrator can view the new user's application on the Invite User's Application List page and approve it.
Importing users
-
On the user management page, click the "Add" button in the upper right corner.
-
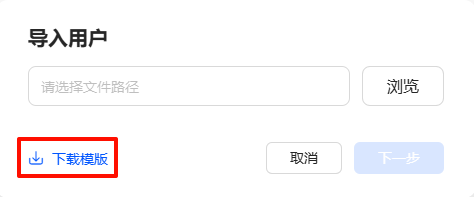
In the pop-up window, select the "Import" method to add users in batches.
-
Click the "Download template" button in the "Import users" pop-up window to download an Excel or CSV template containing user information.
-
Fill in the user information according to the template format, including the required fields such as username, password, and role.
-
After completing the form, save the file and click "Browse" in the "Import Users" window to upload the file, and then click "Next" to continue.
-
You can choose whether to require new users to change their passwords when they log in for the first time.
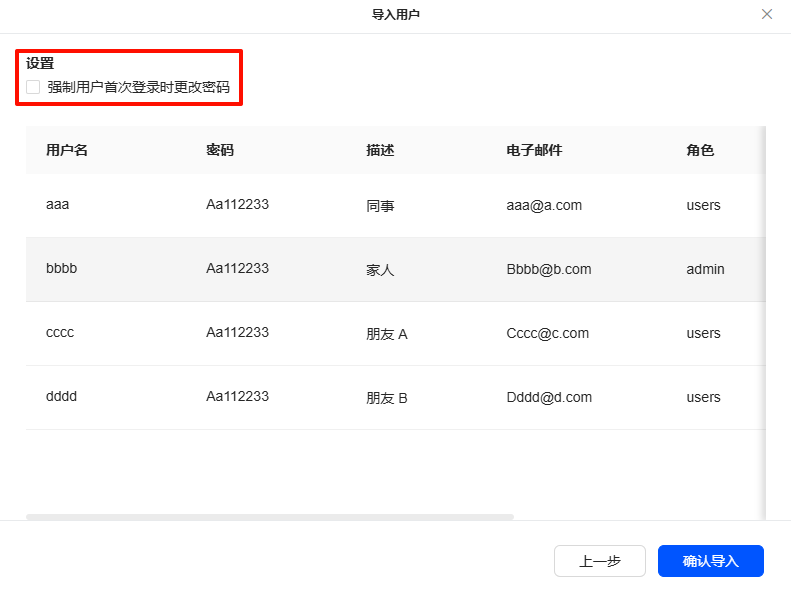
-
After confirming that the information is correct, click "Confirm Import" to complete the user import. Imported users can log in directly to the system by entering their account and password.
Example of the import template form
|
*Username |
Password |
User description |
|
*Role (admin/users) |
Add user groups (separated by commas) |
|
aaa |
Aa112233 |
colleague |
aaa@a.com |
users |
group1,group2 |
|
bbbb |
Aa112233 |
Family |
Bbbb@b.com |
admin |
group1 |
|
cccc |
Aa112233 |
Friends A |
Cccc@c.com |
users |
group2 |
|
dddd |
Aa112233 |
Friends B |
Dddd@d.com |
users |
group1,group2 |
Usage tips
-
Administrators have the highest level of access and can access and manage all system settings. Please assign administrator rights carefully to ensure the security and stability of the system.
-
When a user's individual rights conflict with the rights of the user group to which they belong, the following priority rules apply:
-
Deny access > Read and write > Read-only
-
For example, if the user group permission is "deny access" and the user's individual permission is "read and write", the user's final permission will be set to "deny access".
-
-
When a normal user is created by importing, the personal folder is not enabled by default. If this user is not added to any user group, he will not be able to access shared folders. If you need to adjust the user's shared folder access permissions or enable the personal folder, you can manually add the user to the appropriate user group or authorize it individually after the user is imported.
Related links
Priority of personal permissions and user group permissions in case of conflict