SMB service is a powerful and flexible network file sharing protocol widely used for sharing files and resources between different operating systems. With proper configuration and management, SMB can significantly improve the efficiency and security of file sharing. SMB is an ideal file sharing solution for both home networks and corporate environments. Below is a detailed description of UGOS Pro's SMB services:
Features of UGOS Pro's SMB service
-
Cross-platform compatibility: UGOS Pro's SMB service is compatible with Windows and macOS systems, and also supports mobile phones, TV boxes and other devices. It makes it easy for devices with different operating systems to access and share files.
-
Efficient Performance: UGOS Pro's SMB service optimises file transfer performance, providing fast file read and write speeds, suitable for transferring large numbers of files and large files.
-
File Sharing: SMB allows users to share folders and files over the network, providing easy access and management.
Different versions of SMB
There are several versions of the SMB protocol, each adding features and improving performance over the previous version:
-
SMB 1.0: the earliest version, which supports basic file functionality but poses a high risk due to the lack of adequate security authentication mechanisms.
-
SMB 2.0: Introduced in Windows Vista and Windows Server 2008, dramatically improved performance and reduced overhead.
-
SMB 2.1: Introduced on Windows 7 and Windows Server 2008 R2, adding improved locking and caching features.
-
SMB 3.0: Introduced on Windows 8 and Windows Server 2012, providing encryption, improved fault tolerance, and better performance.
Applicable Scenarios
-
File sharing: In home and small office networks, members can use SMB to easily share files between multiple devices and improve collaboration.
-
Mixed networks: SMB's cross-platform feature makes it suitable for Windows, macOS mixed OS environments, simplifying file sharing and resource management.
Enable SMB service in UGOS Pro
-
Go to "Control Panel > File Services" page.
-
Find the "SMB" option and enable SMB service.
-
Click "Apply" to save and take effect.
Windows connects to NAS via SMB
-
Make sure the NAS and Windows are on the same LAN.
-
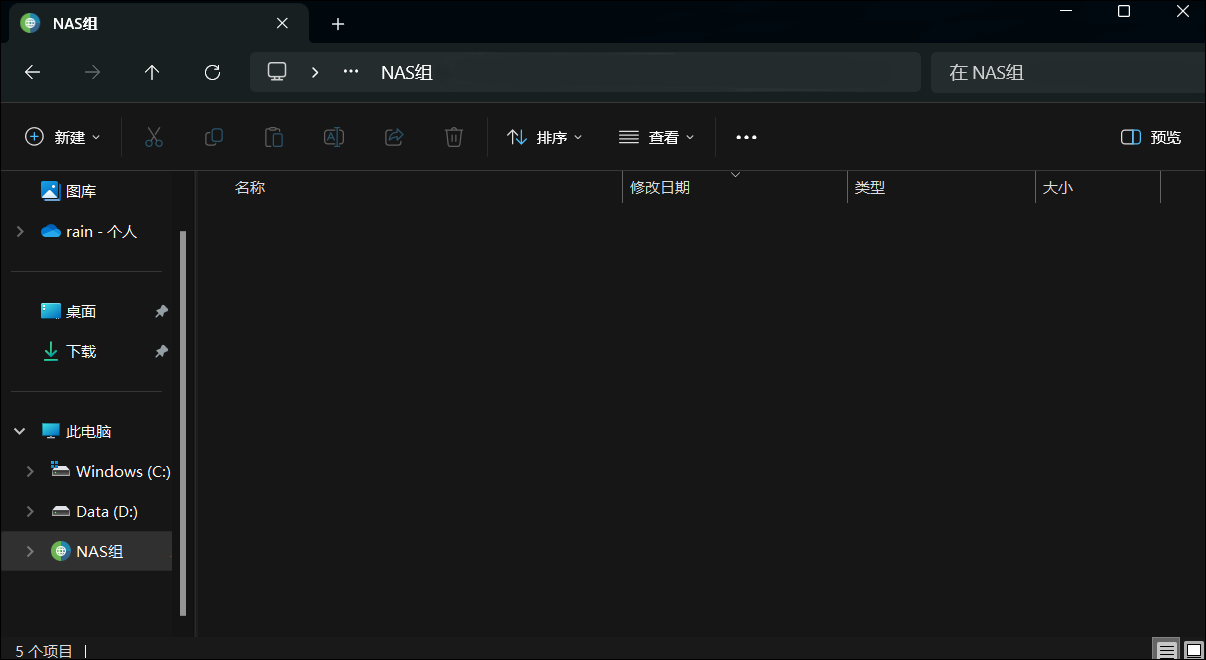
Open File Explorer.
-
Type
\\\<NAS_IP_address>in the address bar and press Enter. -
After entering the NAS user name and password, you can access the shared folder.
macOS connecting to NAS via SMB
-
Make sure the NAS and macOS are on the same LAN.
-
Open Finder.
-
Select "Go To" -> "Connect to Server" in the menu bar.
-
Enter the address
smb://<NAS_IP address>and click "Connect". -
Enter the NAS user name and password to access the shared folder .
For more information about how to connect to NAS via SMB protocol, please refer to"How to use SMB protocol to transfer files from multiple endpoints on LAN?.
Cautions
Starting with Windows 10, Microsoft has strengthened the security of the SMB protocol by disabling insecure guest login by default. This is to prevent unauthenticated users from accessing shared resources and protect data security. If you can't connect to the SMB service, you can try turning on Enable unsecured guest login.
-
Press
Win+Rto open Run, typegpedit.mscEnter to open Local Group Policy Editor. -
In "Computer Configuration > Administrative Templates > Network > Lanman Workstations", find "Enable unsecured guest login" and open it.
-
Tick "Enabled" and click "Apply > OK" to save the settings.
-
Return to File Explorer and try to connect again.
Workgroups
In the SMB (Server Message Block) protocol, WORKGROUP is a logical grouping used to organise and manage computer resources on a local area network (LAN). Through simple configuration, devices in the network can discover, share and access files with each other. Workgroups are widely used in home networks and small office environments.
Workgroup applicability and advantages
-
Simple Configuration: No complex network configuration is required, just set the same workgroup name on the devices, no network administrator expertise is needed.
-
Suitable for small networks: Workgroups are particularly suitable for home and small office environments and do not require complex network infrastructure such as domain controllers.
-
No additional cost: No additional hardware or software support is required.
-
Flexibility: Suitable for a wide range of devices, including Windows, Mac, etc.
-
Resource sharing: With workgroups, you can easily share files, folders and other resources.
Usage Scenarios
Family Networking
-
Sharing multimedia files: Family members can store movies, music, and photos on the NAS, which can be easily accessed by all devices (e.g., smart TVs, computers, mobile phones) through SMB workgroups.
Small Office
-
File collaboration: Employees can share project folders in workgroups for easy team collaboration and file synchronisation.
-
Shared network resources: Through workgroups, employees can share network drives and backup devices to improve resource utilisation.
How to Configure Workgroups
In order to let Mac and Windows computers share files and resources with NAS in the same workgroup, you need to do some configuration. Here are the detailed steps:
Step 1: Configure Workgroups on Windows
Method 1
-
Right-click "This Computer" or "My Computer" on the desktop and select "Properties".
-
In the window that opens, click "Advanced System Settings" on the left.
-
In the "System Properties" window, click on the "Computer Name" tab.
-
Click on the "Change" button. In the Computer Name/Domain Change window, select Workgroup and enter a workgroup name (e.g.
WORKGROUP). Make sure this name matches the name of the workgroup on the NAS and Mac. -
Click OK and restart the computer to apply the changes.
Method 2
-
Open the Control Panel.
-
Select "System and Security" and then "System".
-
Click "Change Settings" and under the "Computer Name" tab, click "Change".
-
Enter the name of your workgroup in the Workgroup box and click OK.
-
Restart the computer to apply the changes.
Step 2: Configure Workgroups on a Mac
Method 1
-
Click on the Apple icon in the top left corner of the screen and select "System Preferences".
-
Select "Sharing".
-
Under "Share Name" click "Edit" and enter a name for the workgroup. Make sure this name matches the name of the workgroup on the Windows computer and NAS.
-
Click "OK" and then click the "Apply" button.
Method 2
-
Click the Apple icon in the upper left corner of the screen and select "System Preferences".
-
Select the "Network" icon.
-
Select the network connection you are using (e.g. Wi-Fi or Ethernet) from the list on the left.
-
Click the "Advanced" button in the bottom right corner of the window.
-
Select the "WINS" tab.
-
Enter a workgroup name (e.g.
WORKGROUP) in the Workgroup field, making sure it matches the workgroup name on the Windows computer and NAS. -
Click OK and then click the Apply button.
Step 3: Configure Workgroups on UGOS Pro
-
On the desktop, go to [Control Panel > File Services] and enter the SMB option.
-
Enter the name of the workgroup in the Workgroup field, and enter the same workgroup name as Windows and Mac (e.g.
WORKGROUP). -
Click "Apply" to save and apply the settings.
Step 4: Ensure all devices are on the same network
-
Ensure that the Mac, Windows computer and NAS are all connected to the same local area network (LAN).
Step 5: Test the Connection
-
On the Windows computer:
-
Open File Explorer and click on "Network". You should be able to see the NAS device.
-
-
On a Mac computer:
-
Open Finder and click on "Network" in the left column. You should be able to see the NAS device.
-
Difference between Workgroups and Domains
Workgroups.
-
Uncentralised management: each computer manages its own resources and users independently.
-
Ideal for small networks: mainly used for home or small office networks.
Domain.
-
Centralised management: user accounts and resources are managed by the Domain Controller.
-
Suitable for Large Networks: Used for enterprise-level networks to support complex security policies and centralised management.
Workgroups provide a simple and effective way to share resources and manage networks in the above scenarios. Workgroups are more suitable for small and home networks that do not require complex network management than domain environments that require complex configuration.
SMB Advanced Settings
The SMB service offers a range of advanced setting options. These options not only improve the security and performance of file transfers, but also enhance flexibility and ease of management. In SMB Advanced Settings, you can make the following configurations:
-
Hide shared folders from users without permissions
-
Function: When this option is enabled, only users with access rights can see the shared folders. Users without permissions will not be able to see these folders.
-
Purpose: Improves security by preventing unauthorised users from discovering and attempting to access shared folders.
-
-
SMB Log
-
Function: Enable this feature to log all file transfer operations over the SMB protocol.
-
Purpose: Used for auditing and troubleshooting to help administrators monitor and analyse file transfer activity.
-
-
View Logs
-
Function: This feature allows administrators to jump to the Log Centre to view recorded SMB transfer logs.
-
Purpose: To allow administrators to quickly access and analyse log information.
-
Steps: Click "View Logs" to open the Log Center and change the log type from "Event Log" to "Transfer Log" in [Log > Current Log] to view the transfer logs. log.
-
-
Log Settings
-
Function: In the log settings, administrators can select the types of operation events that need to be monitored and recorded.
-
Purpose: To customise logging to ensure that only important operational events are logged and to reduce unnecessary log messages.
-
-
Select SMB protocols to be enabled
-
Function: Administrators can select which versions of SMB protocols to enable (e.g. SMB1, SMB2, SMB2.1, SMB3).
-
Purpose: To improve compatibility and security. It is recommended to disable older versions of SMB protocols (e.g. SMB1) to reduce security risks.
-
-
Setting up WINS Server
-
Function: Configures the Windows Internet Name Service (WINS) server for resolving NetBIOS names.
-
Purpose: Improve the efficiency of computer name resolution in networks, especially in large network environments.
-
-
Manage Transmission Encryption Mode
-
Function: Selects the transmission encryption mode, which can be decided by the client, disabled or forced.
-
Purpose: To improve the security of data transmission and prevent data from being intercepted or tampered with during transmission.
-
-
Server Issuance
-
Function: Select whether to enable server issuance, you can choose to be decided by the client, disabled or mandatory.
-
Purpose: To improve data integrity and ensure that data has not been tampered with during transmission.
-
-
Enable SMB durable handles
-
Function: When this option is enabled, cross-protocol file locking is disabled, but improves file handle persistence.
-
Purpose: Improves the reliability of file access, especially in the case of unstable network connections.
-
-
Enable SMB3 Multi-Channel
-
Function: Enabling this option allows the SMB3 protocol to use multiple network connections for data transfer.
-
Usage: Improves the performance and reliability of data transfer, especially in high bandwidth and high latency network environments.
-
Supported OS Clients: Windows Server 2012 or above, Windows 8 or above, macOS 11.3 or above
-
Note: Link aggregation is not supported when SMB3 Multi-Channel is enabled SMB3 Multi-Channel is only supported on x64 platforms.
-
-
Enable Opportunistic Locking
-
Function: When this option is enabled, clients can cache file data to reduce network traffic and improve performance.
-
Purpose: Improves performance of file access, but may increase data consistency risk.
-
-
Enable SMB2 Lease
-
Function: When this option is enabled, clients can lease file handles to reduce network traffic and improve performance.
-
Purpose: Improves the performance of file access, especially if the same file is accessed frequently.
-
-
Clear SMB Cache
-
Function: This option allows the administrator to clear the SMB cache.
-
Purpose: Resolves access issues caused by the cache and ensures file access is up-to-date.
-
-
Enable VFS Module to Convert Mac Special Characters
-
Function: When this option is enabled, the VFS module will convert special characters on Mac systems to ensure file name compatibility.
-
Purpose: Improves cross-platform filename compatibility and prevents filename conflicts.
-
-
Enable local Master Browser
-
Function: When this option is enabled, the server will become the master browser for the local network and manage the list of computers in the network.
-
Purpose: Improve the efficiency of network browsing and ensure the accuracy of the list of computers in the network.
-
-
Enable DirSort VFS Module
-
Function: When this option is enabled, the VFS module will sort the contents of the directory.
-
Purpose: Improves the readability and user experience of directory browsing.
-
-
Prohibit Files
-
Function: Set the type of files that are prohibited from being accessed, for example, the prohibition condition is /*.txt/README.
-
Purpose: Improve security by preventing specific types of files from being accessed or modified.
-
Additional Options: Enable to allow deletion of directories containing disabled files.
-
-
Allow symbolic links in shared folders
-
Function: Enables this option to allow the use of symbolic links in shared folders.
-
Usage: Improves flexibility in file management, but may increase security risks.
-
-
Allow symbolic links across shared folders
-
Function: When enabled, this option allows symbolic links across different shared folders.
-
Purpose: Improves flexibility in file management, but may increase security risks.
-
-
Disable multiple links from the same IP address
-
Function: When this option is enabled, multiple links from the same IP address are prohibited.
-
Purpose: Improves security and prevents IP address abuse.
-
-
Collect debug logs
-
Function: When this option is enabled, the system will collect debug logs.
-
Usage: For troubleshooting and performance analysis.
-
-
Do not reserve hard disc space when creating files
-
Function: When this option is enabled, the system will not reserve hard disc space when creating files.
-
Usage: Improves hard disc space utilisation, but may affect file write performance.
-
-
Enable NTLMV1 Authentication
-
Function: When this option is enabled, NTLMV1 authentication protocol is allowed.
-
Purpose: Improves compatibility, but may reduce security.
-
-
Enable Asynchronous Read
-
Function: When this option is enabled, the system will perform asynchronous read operations.
-
Purpose: Improves file read performance, especially in the case of high concurrent access.
-
-
Synchronise data to hard disk when SMB clients request immediate synchronisation
-
Function: When this option is enabled, the system will synchronise data to the hard disk when the SMB client requests immediate synchronisation.
-
Purpose: Improves data consistency, but may affect performance.
-
-
Enable Wildcard Search Cache
-
Function: When this option is enabled, the system will cache wildcard search results.
-
Purpose: Improves search performance and reduces time spent repeating searches.
-
SMB Frequently Asked Questions
Q1:After using SMB service to mount a folder from NAS to computer, the folder opens blank.
A1:Please check whether the name of your NAS device is the same as the name of your computer, if it is, please change it to a different name, the same name will lead to access conflict.
Q2:macOS devices cannot mount SMB service with device name in LAN.
A2:Mac devices can't use device name to connect in LAN if the first three IP addresses are not the same, for example, the computer connects to the company's wifi to get the IP address is 192.168.78.XX, and the NAS device connects to the network port to get the IP address is 192.168.45.XX, in this case, the mac device can use IP to log into the system, but if you want to use SMB to mount the file, please change the name to be the same, which will lead to access conflict. In this case, the mac device can use the IP LAN to log in the system, but if you want to use SMB to mount files to the computer, you can only use the IP address to mount the connection, and you can't use the name of the device to connect.
Q3:Will the SMB service opened from NAS not be able to be mounted to the computer if there is a problem with the local DNS service of the computer or a problem with the hosts file, or the shared resolution network host name is not enabled?
A3: If there is a problem with the local DNS service or hosts file of the computer, as well as the sharing of network hostname resolution is not enabled, it will affect the mounting of the SMB services opened on the NAS. Specifically, the following are the possible effects of these issues:
1. Problems with the local DNS service
-
Impact: The DNS (Domain Name System) service is used to resolve domain names to IP addresses. If there is a problem with the local DNS service, the computer will not be able to resolve the domain name of the NAS correctly, resulting in the inability to access the shared resources on the NAS.
-
Solution: Check the local DNS settings to ensure that the DNS servers are configured correctly and available. You can try to use commands such as
nslookuporpingto test whether the domain name resolution is normal.
2. Problems with the hosts file
-
Impact: The hosts file is a text file used to manually configure domain name resolution. If the hosts file contains incorrect entries or is misconfigured, the computer may not be able to resolve the domain name of the NAS correctly.
-
Solution: Check and edit the hosts file (usually located at
C:\Windows\System32\drivers\etc\hostsor/etc/hosts) to ensure that the entries in it are correct.
3. Network hostname resolution sharing is not enabled
-
Impact: Network hostname resolution sharing allows computers to access other devices on the LAN by hostname instead of IP address. If this feature is not enabled, the computer will not be able to access the SMB share on the NAS via hostname.
-
Solution: Enable hostname resolution sharing in the network settings of the computer to ensure that the computer can access other devices on the LAN via hostname resolution. For more information about enabling hostname resolution sharing, please refer to Enabling Network Hostname Resolution Sharing.